Mostly about food, this blog is just a place for me to throw things that are of interest to me. I appreciate you taking the time to stop by an look around. This represents just some of the stops on the various pathways that this amateur home cook finds himself.

You may find that these foods tend toward protein and away from carbohydrates - this is due to diabetic issues, so I try to only sparingly use carbs, and good ones at that. Of course, sometimes I forget....

Feel free to drop me a line with any suggestions or just to let me know what you think. Thanks!

If you c


Search This Blog

A Little Navigation...

Yá át ééh!

I want to thank you for the time that you spend here, and hope that you can find useful things here.

Hagoonee'


Showing posts with label other meats. Show all posts

Monday, April 30, 2012

Silky Chili Mac Italia

Fancy cooking?  Bah, sometimes you just want comfort food!


 Couldn't get motivated to be all culinary, so the alternative was to be creative.  Sometimes serendipity reigns, and it turns out pretty darned good.

COMPONENTS
1 quart home made chili, previously made, WITHOUT BEANS
2/3 cup shredded cheddar cheese
2/3 cup Jarlsberg cheese, diced small
12 ± Italian style meatballs, halved
4 oz.  elbow macaroni, cooked al dente

METHOD
Heat the chili gently in a large skillet.  When warm, add the meatballs.  


When hot (do not simmer or boil), start adding in the cheese a little at a time, stirring constantly to ensure complete melting.  This is what makes the final result silky, so don't get in a hurry.


 Once the cheese is fully incorporated, start stirring in the cooked macaroni.  When everything is finally heated together, serve in bowls along with Parmesan cheese, cracked black pepper and red pepper flakes available on the side.  If the chili you used is too spicy, some may also want some sour cream.


Friday, April 20, 2012

If You Like Schlotzsky’s...


I had a Schlotzsky’s® Original sandwich a couple of weeks ago, and it had been years since the last one.  I forgot how great all those toasted layers played together, and especially how that great bun really anchored all the flavors with its special taste and texture.  Well, the OCD in me took over and I was determined to make it for myself.  There aren’t any of these restaurants near me, and I figured that if I wanted one I was going to have to make my own some how.

This was basically going to come down to three challenges: find a recipe to recreate the special bun, create a recipe to recreate the special garlic dressing, and getting the sandwich put together with the right things in the right order.

There are dozens and dozens of links to recipes for a “Schlotzsky bun recipe” on the internet, but they basically come down to two – the recipe the store uses (pounds of proprietary mix) or a home made copycat that everyone seems to have copied.  The first is obviously useless, the second I found unsatisfactory as it wasn’t really close.  After many tries, I think I have it nailed pretty well.

Starting with some stock recipes, it only took a few tries to get the garlic dressing down.  It’s very simple and very tasty, and can sure be used on other things too.  Finally, I found a reference from a former employee who laid out not only the ingredients for the sandwich, but also the order of assembly and the instructions for the technique.  He remains anonymous, but the process is outlined below.  Hopefully, some of you will undertake this project and provide me feedback on your results.  

Okay, here we go…

FILLING INGREDIENTS (for 1 large sandwich, adjust as needed):
CLONE - Sandwich Bun (recipe below)
CLONE - Creamy Garlic Dressing (recipe below)
Parmesan cheese, grated
1 cup mozzarella cheese, shredded
1 cup cheddar cheese, shredded
2 oz. cotto salami, sliced very thin
2 oz. genoa salami, sliced very thin
2 oz. boiled ham, sliced very thin
yellow mustard
red onion, sliced thin
tomatos, sliced
lettuce, shredded
½ cup black olives or marinated black olives


METHOD
Slice open the loaf horizontally into 2 even thicknesses.   

 
Apply spiral rings of garlic on each bun half starting from the outer edge inward - six for large, 3 for medium, 2 for small sandwich.  Add Parmesan cheese from a shaker, roughly 5 to 6 shakes to lightly dust both entire buns.

Distribute one cup of shredded cheddar cheese on the bottom bun, and one cup of mozzarella cheese on the top bun.  Put both buns in a toaster over at a heat of 375 degrees, to barely melt the cheese until you see it bubbling a bit, then pull them out and spread the cheese evenly with a spatula.
On the bun with the cheddar put 1/2 cup of the olives, then slices of boiled ham covering the entire sandwich overlapping each ham slice.

Remove the top bun from the toaster over spread the mozzarella cheese out evenly with the spatula; put the bottom bun back in the oven while you work on the top.

On the top bun place slices of cotto salami laid out the same as the ham then the slices of Genoa salami even spread out on top of the cotto salami, finishing with rings of yellow French’s mustard.  Put the top salami bun in the oven and take out the bottom bun and get ready to dress it.  On the bottom bun add first shredded lettuce, sparingly just enough to cover the bottom meat.  Next, add your slices of tomato and thinly sliced red or yellow onions, six thin slices, no more. 

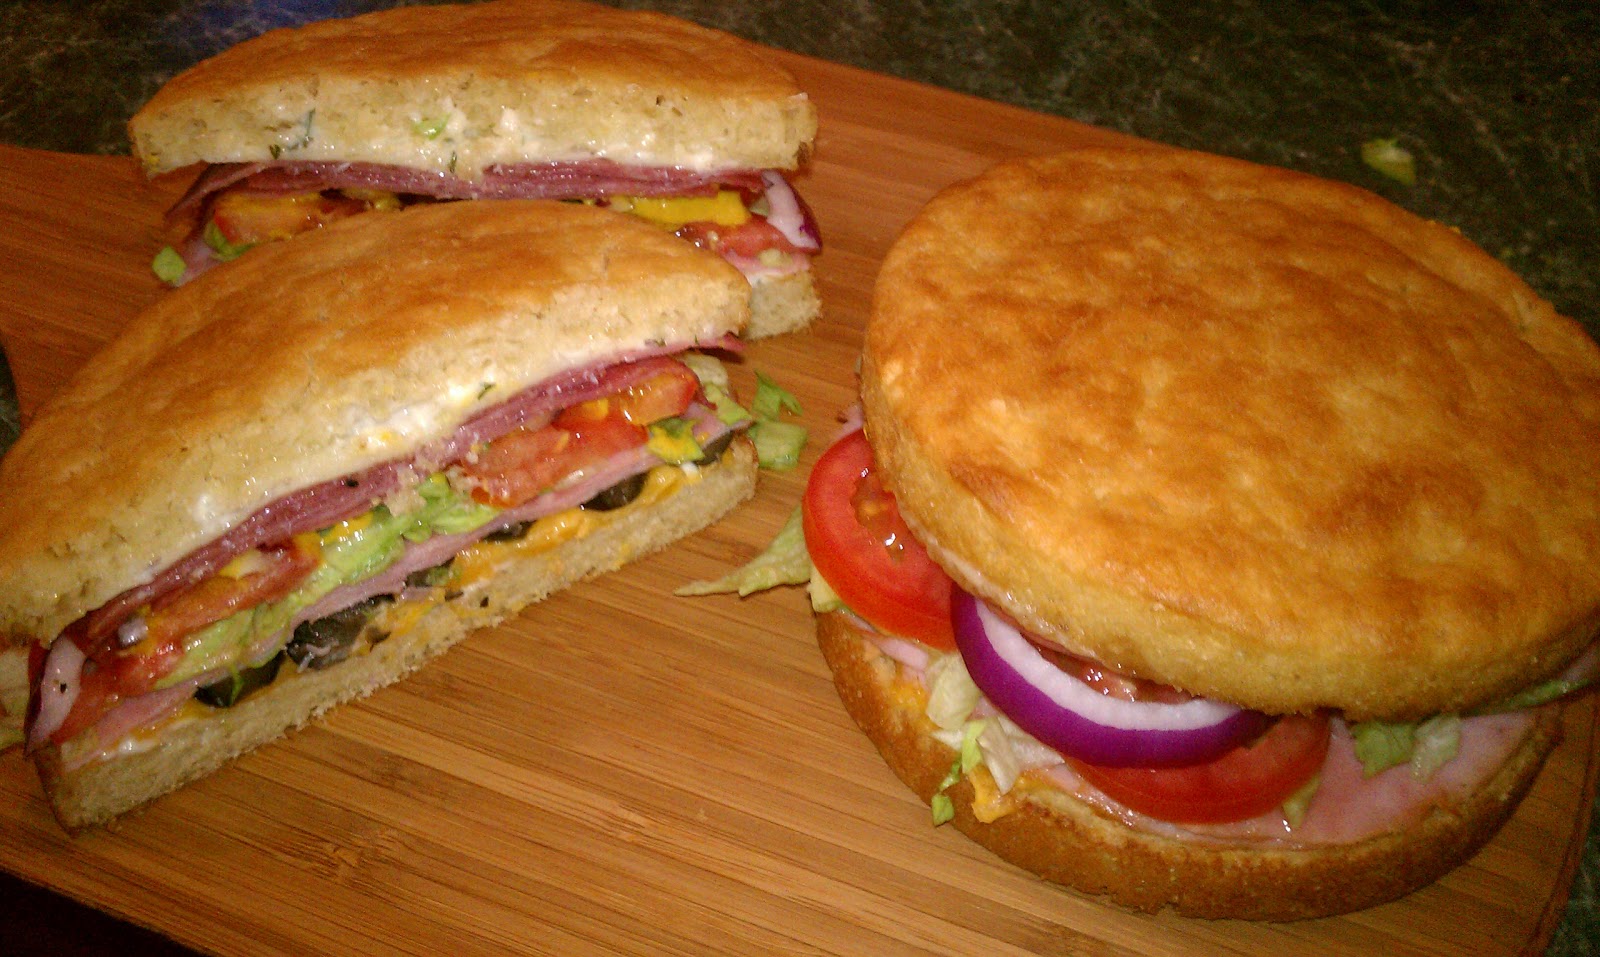
Here are two beauties, ready to go.


Retrieve the other bun but it together, and prepare to feast!


CLONE - Original Sandwich Bun

Makes 2 large or 3 medium sandwich buns

INGREDIENTS
1 recipe CLONEsky’s® sourdough starter (recipe follows)
2 teaspoons white sugar
1/4 teaspoon baking soda
3/4 cup lukewarm milk (at about110° F)
1/2 teaspoon salt
2 cups bread flour
2 tablespoons corn meal


METHOD
In a large bowl, stir together the warm milk, sugar, salt and baking soda. Stir to dissolve, then add in the CLONEsky’s® sourdough starter and whisk together.  Beat the flour into the liquid mixture one half cup at a time until smooth, then move on to the next half-cup. When you are finished, the batter should be thick, very sticky and smooth.

Prepare 2 each 8” or 3 each 6” pie or cake pans with non-stick spray, and then scatter the bottom of the pans with the corn meal.  Divide the dough evenly between the prepared pans.  It won’t look right, but the batter will spread as the dough rises. Spray the top of each bun with non-stick cooking spray, and then cover and let rise for one hour in a warm draft-free spot for one hour.  I turn on the oven for a minute and then right back off, and let it rise in there.  It should be barely just warm.

Once the dough has finished rising, spray the top of the bread with non-stick cooking spray lightly again. Bake in a preheated 375° F for 20 minutes.  Once the top is lightly golden and a toothpick comes out clean, you are done.  Turn the finished loaves out on a cooling rack, and allow to cool for an hour before slicing.


CLONESKY’S SOURDOUGH STARTER - yields about 1 ¼ - 1 ½ cups
  • 1 cup warm water (110 degrees F)
  • 1/2 tablespoons active dry yeast
  • 1/2 teaspoon sugar
  • 1 cup all-purpose flour
Combine the water, yeast, and sugar. Let sit until the yeast becomes foamy, about 5 minutes. (If the yeast does not foam, discard the mixture and begin again with  new yeast – check the date.)
Add the flour and stir briskly to work in. Cover loosely and let rest in a warm, draft-free place (like an oven with pilot light or light) for 8 to12 hours. (The mixture should become very bubbly.)  Now you can use your Schlotzsky’s® sourdough starter to make your Markzsky’s® Original® No-Knead Sandwich Buns!
CAUTION: Never keep any sourdough starter tightly closed! The gasses that build up from the yeast can pressurize the container (such as a glass jar) and possibly make it burst!


CLONE - Creamy Garlic Dressing

1 c. mayonnaise                                               2 tbsp. minced parsley
1 tbsp. white vinegar                                       1 tbsp. milk
1/2 tsp. powdered garlic                                 1/2 tsp. sugar
1/2 tsp. salt

Whisk all ingredients together in a medium bowl.  Load into squeeze bottle and keep in refrigerator. Makes about a cup

Tuesday, October 18, 2011

Lamb Burgers, with all the extras


Looking for something tasty and different?  Skip the hamburger; embrace the Lamb Burger!  These were served along with pickled red onions, home made tzatziki sauce, and a Greek relish.  You can buy ground lamb in most major supermarkets, but if you have the choice, purchase whole lamb meat and ask them to grind it for you at the time, it will be much fresher.   
Opa!


Ingredients
Lamb Burgers
1 pound ground lamb
1 teaspoon minced garlic
1/4 cup chopped fresh cilantro
1 tablespoon olive oil,
1/4 tsp dried oregano
Kosher salt and fresh ground pepper

Tzatziki Sauce
1 medium cucumber, halved and seeds removed, then grated
1 cup Fat free, plain Greek yogurt
2 garlic cloves, Crushed
1  teaspoon chopped fresh dill
1  tablespoon fresh lemon juice
Salt & Black pepper to taste
2 teaspoons olive oil

Pickled Onions
½ red onion, thinly-sliced
½ cup cider vinegar
½ cup red wine vinegar
1 teaspoon unrefined light brown sugar

Greek Relish
1 cup coarsely chopped roasted Italian red peppers
1/4 cup pitted and chopped marinated Kalamata olives
2 teaspoons finely minced garlic
1/2 cup chopped cilantro
1/4 cup fresh crumbled Feta cheese
2 teaspoons lemon juice
2 Tablespoons extra-virgin olive oil
kosher salt and fresh ground pepper to taste

Method

Preparing the onions:
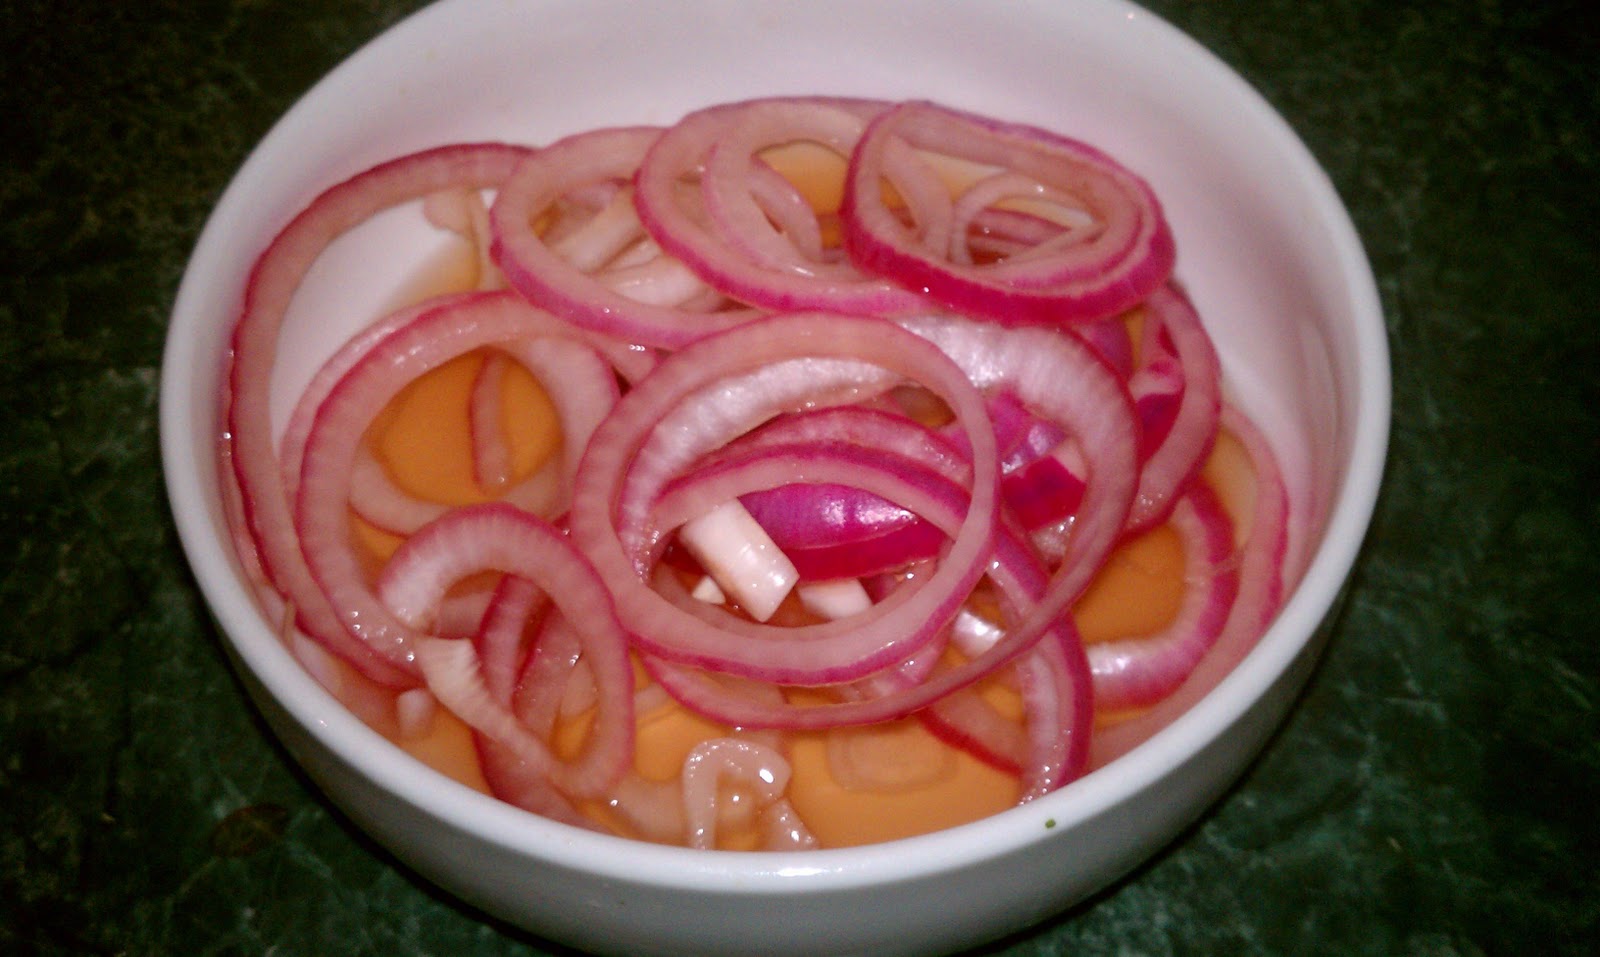
The thinner you can slice the onions, the better this will be.  Unfortunately, I was in an hurry and the onions in the picture below are away too thick.  Mix the vinegars and sugar together, submerge the onions in the mixture, and set in the fridge to marinate.  By the time you are finished with the burgers, these will be ready.


Preparing the onions:
Prepare the cucumber as stated above.  Using a food processor, puree the garlic cloves with the salt & pepper.  Add the cucumber, yogurt, olive oil and dill, the pulse it and give it a taste.  Add seasoning if needed, then remove to a bowl in the fridge until needed.


Preparing the relish:
Prepare the peppers, olives, cilantro and garlic as stated above.  Mix them well in a large bowl with the Feta, salt & pepper.  Add in the lemon juice and olive oil, then mix to coat.  Give it a taste test and adjust salt & pepper if needed.


Move the finished relish in a bowl, and put it in the fridge with the other condiments until the burger is finished and ready to assemble.


Now for the burgers:
Next comes the main act.  The main concern here is not to overwork the meat.  The more you squeeze and mix it, the more tough it may end up.  Start off by taking all of the ingredients for the burger (except the meat) and mixing well in a bowl.  Crumble small pieces of the ground lamb mixture into the bowl, lightly stirring together until all is loosely mixed.  Now you will divide the mixture in half, and loosely form each half into a patty.  These will shrink some on the grill, so if you make the patty just larger than your bun it will work out perfectly.


I left them in the fridge for about 20 minutes to firm up, and then it was off to the grill.  Grill these over medium coals, turning only once.  Now, as they cook, they are going to lose a lot of grease, so you are going to have to keep an eye out for flare-ups.  Just don't overcook them - these were done to 150° internally as was read on a digital thermometer.


Here you see the finished product, assembled and ready to be consumed.  The buns were toasted to help keep the burger together when all assembled.  From the bottom up, there is tzatziki, pickled onion, the lamb burger patty, and finally the relish.  Layers and layers of flavor.

 
Halfway through it, and boy that lamb is tasty!  Notice that it is not pink like a hamburger might be, but trust me, it's not overcooked...


Tuesday, September 20, 2011

Savory Texas Meatloaf


Everybody has a recipe for meatloaf.  Many people aren't happy with theirs, but are stuck in a rut.  Consider giving this one a try - there are a few tasty differences that make it mighty good.  And even better, it makes plenty, so there's lots left over for meatloaf sandwiches the next day!


Ingredients:
1 large onion, cut in small dice
1 carrot, cut in small dice
1 Poblano pepper, cut in small dice
3 tablespoons butter
2 teaspoons pepper
5 teaspoons minced garlic

2 lbs. ground beef, 80/20
1 lb. ground pork
1 lb. ground lamb

1 cup breadcrumbs, unseasoned, fresh preferred
1/2 cup milk
1/2 cup ketchup
3 eggs
1/2 cup (compressed) of finely chopped cilantro
1/2 cup chopped cooked bacon

1/2 cup ketchup
2 tablespoons Worcestershire sauce
2 teaspoons salt
2 teaspoons pepper


Method:

Combine the breadcrumbs and milk together to create a mush. Prepare the vegetables as directed above.


In a large skillet, add the first 5 ingredients and sauté until the vegetables soften.  When soft, add the garlic and stir in well, cooking 1 more minute.  Remove from stove and allow to cool.  Gather your defrosted meats - clockwise from left, beef, pork lamb:


In a large bowl, separate and scatter the meats evenly in the bowl.  You don't want to over-mix the meat mixture, as that will make your meatloaf tough.  Add in the cooled vegetables, milk /breadcrumb mush, ketchup, cilantro and the eggs.  Heat your oven to 350°.


Mix until all parts are evenly distributed and then let it rest.  Divide the mixture evenly between two loaf pans, taking care to make the center a little lower than the edges.  This will help to cut down on the tendency for cooked meatloaf to have a large center bulge.


Finally, scatter half of the bacon across the top of each loaf.  Now pop the loaf pans into your oven, and set the timer for 45 minutes.  Combine the last 4 ingredients into a Texas Tang sauce so that it will be ready for the next step.


After an hour, remove the loaf pans and set on a cooling rack, and remove the loafs from the pans.  Place the loafs on a larger rimmed pan, and divide the ketchup sauce evenly over the tops of the two loaves.  Below you see the loafs after having been sauced, and ready for the oven again.


 Below is an oblique shot, and you can make out how relatively flat the tops are.  This will help a lot with making meatloaf sandwiches later!


Pop them back in the oven for another 45 minutes, or until the internal temperature reaches 155°.  Don't overcook or it will start to dry out!  The jalapeño garnish is, of course, optional as are the Pintos-n-Pico on the side.


Thursday, September 8, 2011

Stuffed Portobellos with Prosciutto-wrapped fresh Asparagus


Ingredients
• 2 Portobello mushrooms
• 1 T plus 2 teaspoons extra-virgin olive oil, plus more for drizzling
• 6 oz. ground lamb
• 2 oz. Mexican chorizo
• 1/3 cup combined finely chopped onion & bell pepper
• 2 t minced garlic
• 1/3 cup combined bread crumbs & grated Parmesan cheese
• 1/4 cup minced fresh cilantro
• 1/2 t BBQ rub
• 1 egg, lightly beaten
• Balsamic vinegar, for drizzling

• 1 lb. fresh asparagus
• 1 Portobello, stemmed, gilled and cut into strips
• 2 slices thin Prosciutto de Parma
• kosher salt & fresh ground pepper

Method:
Preheat the oven to 400 degrees F. Prepare the Portobello mushrooms by removing the stem and then gently scraping out the brown gills. Clean and finely mince stem; discard gill material. Rub each Portobello mushroom down with a bit of olive oil.

Lightly salt and pepper the lamb and cook in a small skillet until just browned. Remove to a bowl. Next, cook the chorizo until just cooked, say 4-5 minutes. Add the lamb back in, as well as the onion, bell pepper, garlic, and mushroom stems and cook until softened, about 3 minutes. Remove from heat.

Transfer sausage-vegetable mixture to the bowl of a food processor. Add half of the breadcrumb/ cheese mixture, 1/2 the cilantro, the rub, and the remaining olive oil. Pulse until mixture is finely chopped and comes together slightly, about 30 seconds. Transfer the mixture back to your bowl, add the egg, and stir until well combined.

Divide the filling among the mushroom with 1/2 for each mushroom. Place the filled mushrooms on a baking sheet.. Divide the bread crumb/ cheese mixture evenly among the tops of the mushrooms. Bake until golden brown on top and the mushrooms are tender, about 15 to 18 minutes. Remove from oven and let cool slightly.

While the above is cooling, snap the asparagus to length and cook along with mushroom strips on a plate in microwave for 45 seconds. Remove to counter, divide into 2 portions. Fold each slice of Prosciutto in half lengthwise. Wrap each bundle of asparagus and mushrooom strips in one slice of Prosciutto, season with salt and pepper, and place in a lightly oiled skillet over medium heat. As you see the edges of the Prosciutto start to turn, flup the asparagus bundles carefully to cook the other side. This may only take like 2 minutes per side.

Remove the asparagus to your plates, then add the stuffed mushrooms tot he plates. Garnish them with remaining tablespoon of cilantro, drizzle with olive oil and vinegar and serve warm or at room temperature.

Saturday, August 6, 2011

Native Supper

A simple dinner tonight, taking our foods from the First Peoples in the western hemisphere. From the Táino peoples of the Greater Antilles in the Caribbean, we have the origins of the sweet potato. Also, from the plains we have the Great American Bison.

And finally from the Four Corners area, we have Anasazi beans and the three sisters of beans, squash and corn. Before the Navajo, there were the Anasazi, who somewhere around the 8th century began to rely more and more on cultivated crops. These included squash, maize (corn) and beans. Although their civilization mysteriously vanished in the 12th and 13th centuries, their food heritage has not.

I baked the sweet potato just like you would a regular potato - you can use either the oven or a microwave, just don't over cook. I also put together a Three Sisters Succotash, and grilled up some bison filets on the super-hot rocket grill. We had a simple, easy to prepare and nutritious Native American supper, with about as few artificial ingredients as there can be in a meal.

Yá'át'ééh, shik'is.

Chimney Grill - fast, good, cheap and easy

I had two small 2" thick bison filets to grill for tonight's dinner, and it is such a waste to fire up a big old Weber kettle for these two small, quick cooking beauties. A good steak ought to be cooked fast over a hot fire, leaving a nice firm crust (a la Ruth's Chris) and still a nice juicy interior. Can you accomplish this in a fast, easy and inexpensive way? Absolutely! Make sure your meat is at room temperature before putting it on this grill.

Like many people who use and appreciate the subtle excellence of charcoal grilling over propane, I use a chimney for starting my coals instead of *ugh* lighter fluid. They work very well, very quickly, and don't leave any funky tastes behind like petroleum. The best way that I have found to start the chimney is to take 3 paper towels, fold them into the size of one, and drizzle some cooking oil in the center.

Stuff this lightly into the bottom of the chimney, and add the desired amount of charcoal in the top, depending on how much you will need. Once you light the paper, the oil will keep it burning much longer than say, the frequently-used newspaper. The paper towels will also completely disappear, unlike newspaper which leaves a big nasty bunch of ashes behind.

Follow the above instructions for starting the chimney, but you only need to add 15 - 20 briquettes. Told you this would be fast and cheap! Light the paper towels, set the chimney on your regular grill, and let it be for a few minutes until your coals turn gray.

CAUTION:
Do not under any circumstances use this technique and set the chimney on any type of concrete or cinder block (CMU) Concentrated heat like this produces can superheat the moisture in the concrete, and cause it to fracture violently or explode.

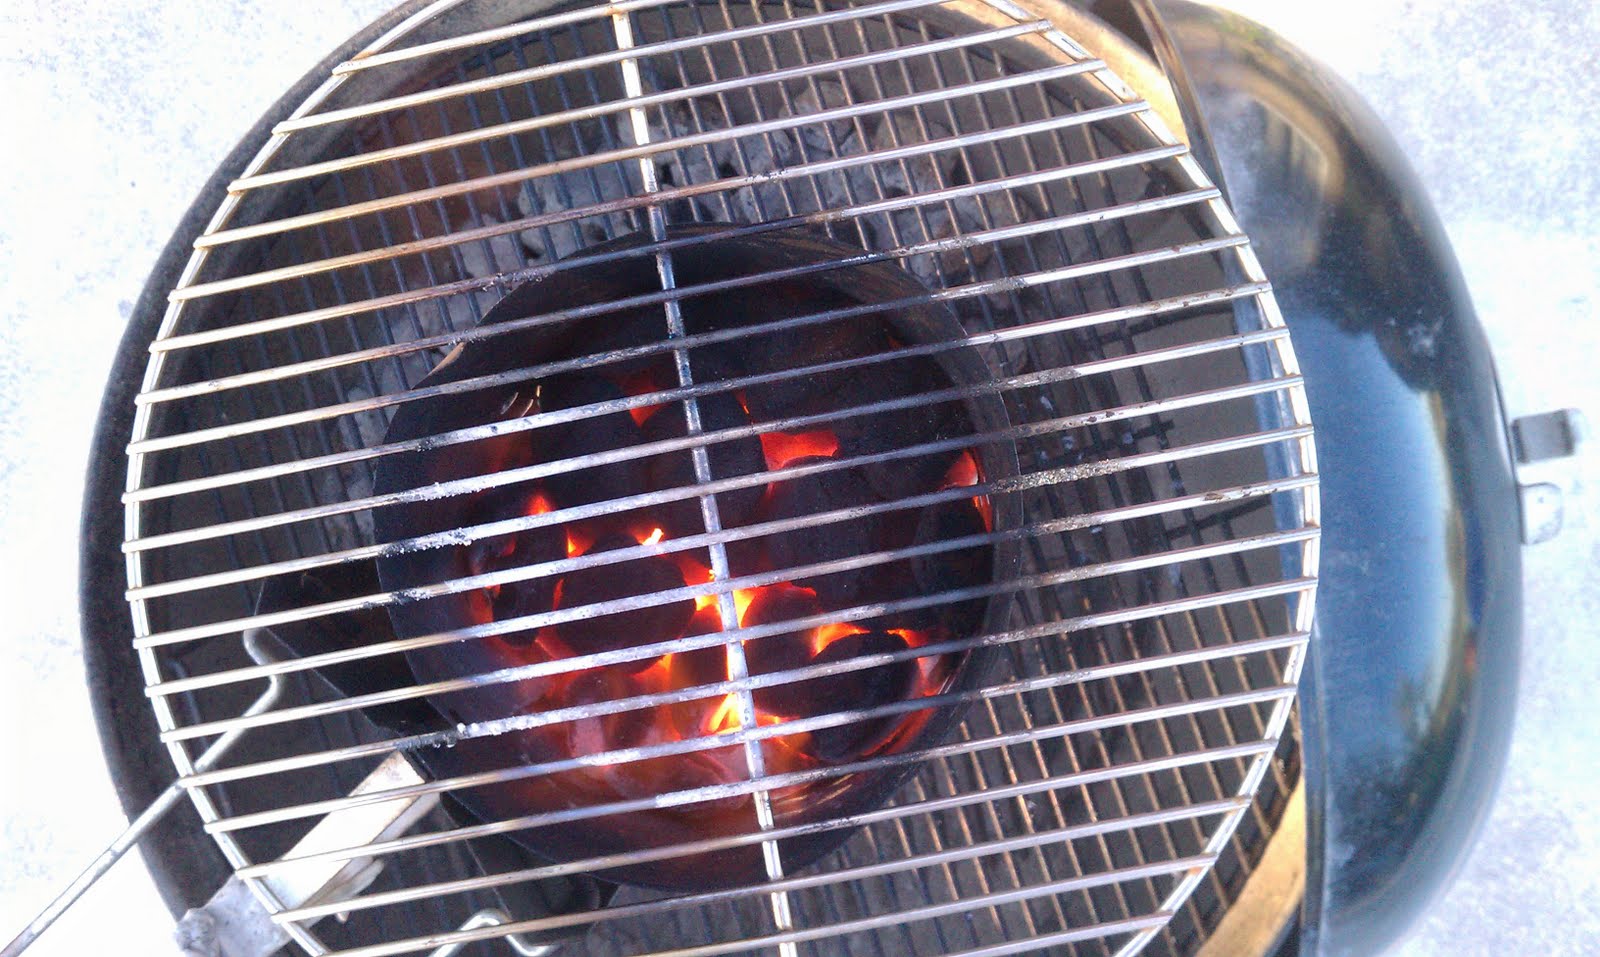
The way the chimney works, it draws air up through the bottom and the hot air from the coals shoots out the top. This burns much faster and hotter than in an open grill, and we can take advantage of this.

When this happens, set a small grate on top of your chimney - this will be your new rocket grill. You won't believe how well and quickly this works.

On go the fillets. You will see and smell the goodness almost immediately. Monitor the cooking constantly, this isn't something you can walk away from. Turn after 2-3 minutes. Repeat until both sides are done. Personally, I use a Thermapen from Thermoworks to make sure my internal temps are right - about 125°-130°. You may actually have to move them on and off the fire so as to not overcook the outside while finishing the inside - it's that hot.

Once you pull them off, cover the steaks lightly with foil and let rest for 5 minutes to let the juices redistribute. If you cut it open now, all the nice juice would run out, and leave the meat more dry. If you wait, you get this:

The best part is that what's left f the coals will soon die out, and you have a much easier cleaning up job than if you fired up the whole grill.

Monday, May 9, 2011

Quintissential Leg of Lamb - Mother's Day


BONELESS LEG OF LAMB
serves 8 - 10
• 1 (5 lb) leg of lamb - boneless
• 3 cloves of garlic - crushed
• 2 teaspoons of dry oregano
• 2 teaspoons of dry thyme
• 2 teaspoons of dry rosemary
• 1/2 cup of olive oil
• 1/2 cup of lemon juice - fresh squeezed
• 2 cups of dry red wine
• 2 teaspoons of salt
• 1 teaspoon of pepper
Combine in a small bowl the garlic, dried oregano, thyme, rosemary and 1/4 teaspoon of freshly ground pepper. Rub the garlic and spice mixture all over the lamb. Put the lamb in a large plastic bag and pour in the olive oil, lemon juice, and red wine. Squeeze out as much of the air as possible from the bag and seal it closed. As a precaution against the bag leaking, wrap a second bag around marinating lamb. Set the bag in a dish and let the lamb marinate in the refrigerator for several hours or overnight.
Remove the lamb from the refrigerator at least 1 hour before cooking.
Preheat the oven to 450 degrees. (After 20 minutes of cooking the oven temperature will be lowered to 325 degrees). Remove the lamb from the bag and pat it dry with paper towels. Discard the marinade, it is no longer usable. Combine the 2 teaspoons of salt with the remaining 3/4 teaspoons of freshly ground pepper. Season the lamb with the salt and pepper.
Place the lamb on a rack in a roasting pan.
Roast the lamb for 20 minutes at 450 degrees then lower the oven temperature to 325 degrees. Continue cooking until desired internal temperature is reached – approximately 135 F - 140 F. Let stand for 10 minutes before cutting. Slice the lamb into 1/2 inch thick slices across the grain.


Friday, March 13, 2009

Lamb Chops - Mmmmm

Never done Lamb chops on a smoker before, and I was given these beauties by my father, so I figured "What the heck"? I drizzled them with olive oil, applied some kosher salt, cracked pepper and powdered garlic, and let them rest on the counter. Some animals you just have to open and let 'breathe'.


TIme and hunger dictated that they end up being grilled for a quick finish. Below is the final result. You can see the nice color from the light smoke and the grill marks from the finish. Unfortunately, Hunger won out, so there are no pics of the sliced lamb, but it was hot, rare, juicy and tasty! Here you see it served with two sides; a nice rice pilaf wearing parsley and Crimini mushrooms broiled in butter and topped with Parmesan cheese.